Pixel Mode
There is also a single-frame pixel-art mode: canvases of any width and height, a much higher colour cap, and a specialised chart export — built for perler beads and stitch charts.
Animation: Tauri onlyPixel art is in both editions; device animation — the kind that goes into a Clawdmeter — is exclusive to Tauri (the paid edition), and the free download offers pixel art only.
Edit mode
Draw, preview, frames, colours, export and import. Hover over any item below and the matching zone lights up on the image.



Colours and frames are the two things you switch between most often, so they sit next to each other; the device preview is pinned to the left column and never collapses, because you need to watch it the whole time you tune the frames.
Four tools, two actions, one switch
Draw, erase, select, and pick colour are the basics; the mirror tools make it easy to copy the opposite half. Onion skin lets you see how this frame differs from the last.
✏Pendefault
Click a cell, or hold and drag across, to fill in the currently selected colour.
▱Eraser
Clears cells to transparent — that is, index 0. Transparent on the device means "not lit," not "painted black."
⬚Select
Draw a box to pull out a region — you can move it, flip it, or copy it to another frame.
While a selection is active the arrow keys nudge it one cell; with no selection the arrow keys switch frames instead — the same keys, depending on whether you're holding something.
◍Eyedropper
Click a cell to pick up its colour index. Click an empty cell and you pick up transparent.
⇋Flip horizontal / Flip vertical
What flips is the selection; with no selection, the whole canvas flips.
These two aren't tools, they're actions — press one and it happens once, it never stays in a "selected" state.
◨Onion skinon by default
Lays the previous frame faintly beneath the current one, so you can see where the last frame's motion ended. The first frame shows the last frame underneath — because the animation loops, the "previous frame" of the first frame is the last one.
Only the canvas draws onion skin. The device preview deliberately doesn't: it's meant to show exactly what the device will light up.
Frames and milliseconds
The top half of the right column is the frame strip. Every frame has its own hold in milliseconds — the whole animation doesn't share one speed, each frame gets its own value. To hold one frame half a beat longer, change only that frame.
- + Insert a blank frame after the current one.
- ⧉ Insert a duplicate after the current one — subtly tweaked animations are mostly grown this way.
- 🗑 Delete the current frame. Disabled when only one is left: an animation can't have no frames.
- ← / → Swap places with the previous / next frame. Automatically disabled at the ends.
With no selection, the keyboard ← → switch frames directly — this is the fastest way to judge whether the motion reads: flip back and forth and see whether it looks like it's moving.
Colours: 36 seats, 256 candidates
"Colours in this animation" is the set of swatches this animation actually uses, with a cap of 36 colours. That number isn't a design preference — it's the size of the device firmware's palette, and anything beyond it has no place to go there, so the editor stops you right here.
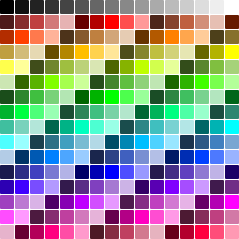
Below it, "Pick a colour" is the built-in 256-colour palette: 16 shades of grey, plus 24 hues × ten variants (five muted, five vivid, each in five levels of brightness). Brightness deliberately doesn't reach either extreme — too dark is invisible on the pure-black panel, and pure white is already in the greyscale row.
+Add
Adds this colour to "Colours in this animation" and selects it. A colour already in use just gets selected when you click it — it won't take up a second seat.
⇄Replace
A two-step mode you can start from either end: with a new colour already in the hex box, press Replace first, then click the colour you want gone — a cell on the canvas or a swatch in the row, either works; with nothing picked yet, select the old swatch first, press Replace, then give it a new colour from the palette, the gradient, or a hex code you type.
Every cell in the image that uses that colour changes together. Use this when the seats are full, or when you want to shift the whole palette. Changed your mind halfway? Esc cancels.
Index 0 is transparent and can't be replaced with a colour.
⚠️ The device panel is pure black. A dark colour that looks just right on a white editing interface will simply disappear once it's on the device — so pick the whole animation from the brighter half.
Supported canvas sizes
Device animation supports three sizes for now — 20×20, 40×40, 60×60 — driven mainly by the sizes the open-source device firmware supports. Uses that never enter a device, like beads and stitch charts, go through the other kind of document: pixel art, where you type the grid yourself.
 20 × 20largest cellsFew cells, each one large. Good for badges, symbols, minimal expressions — you have to say something in just a handful of cells. On the device it's 12 px per cell full-screen, 4 px as a badge.
 40 × 40commonThe balance point between detail and workload. Most full-screen splash animations are drawn at this size: 6 px per cell, 2 px as a badge.
 60 × 60smallest cellsMany cells, each one small. There's room for curves and gradients, but filling it cell by cell also takes the most time.
Device preview and the 20-second animation limit
The same animation shows up in two places on the device, so here you get two preview sizes at once:
- Full-screen splash — fills the whole panel on boot or standby.
- Corner badge — a small icon tucked into the top-left corner can be animated too. A 40×40 animation is only 2 px per cell here, so the detail blurs away entirely. You see it while drawing, no need to burn it in first to find out.
What you preview is what the device shows.
How to read the numbers
The device gives each animation a fixed 20-second rotation. The editor converts "milliseconds per frame × frame count" into how many loops fit in 20 seconds, then tells you whether it gets cut off. The image above is two frames at 125 ms each — one loop is 250 ms, and 20 seconds is exactly 80 loops — so it shows the first state below.
Whether it gets cut off isn't right or wrong, it's a trade-off. Some animations don't mind being cut mid-loop (a rain scene, say), others are ruined by it (a firework going off halfway) — so the editor just tells you the facts, it doesn't decide for you.
Pixel art: beads and stitch charts
Everything above is about device animation — whitelisted sizes, 36 colours, the 20-second slot. Every one of those limits is a copy of what the device firmware can do. But a pixel grid has another use entirely: perler beads, cross-stitch and knitting charts want one image. It never enters a device, it doesn’t need to move, and the grid count is decided by your paper and your materials.
So pixel mode has a second kind of document: pixel art. In the toolbar’s “New canvas”, pick “Free pixel art (custom size)” from the preset menu and type the width and height yourself — rectangles are fine. It shares the same editor, the same swatches and the same tools as device animation, but a different set of limits — because it never promises to enter a device.
The same editor with a whole column of things missing: no frame strip, no onion skin, no device preview, no animation name or category. A single-image document doesn’t need them, and leaving them there only makes you wonder what you forgot to set.
- Custom grid — 1 to 512 cells per side, rectangles allowed. A 50×80 chart is just 50×80.
- 255 colours — not 36. Bead codes run long and 36 seats aren’t enough. The board is still the built-in 256; when that isn’t enough, click the gradient underneath and sample your own colour.
- Always transparent underneath — there is no background colour row. An empty cell stays empty: it means “no bead here / no stitch here”.
- Add and remove rows in place — a + / − pair sits on the right and bottom edge of the sheet, so you can change the grid while you draw; the top-left corner stays put. New cells come in empty, a removed row is gone at once, and ⌘Z brings it back.
- Row and column rulers — numbers along the top and left edge; move the cursor and that row and column light up. You don’t have to count cells with your finger.
- Status readout — “W × H cells · N painted”, always there, updating as you paint.
Chart export: the sheet you actually print
What beadwork and stitching really need isn’t the image on screen — it’s a chart you can print and count from. So a pixel-art document’s save dialog has one extra format, “Chart” (device animation doesn’t offer it — its outlets are GIF and JSON). Press it and you get a PNG:
| Swatch | Code | Count | % |
|---|
- Grid lines and row/column rulers — in black, readable on white paper.
- A colour serial in every cell — numbered from 1, and only colours actually used get a number. Black or white ink is chosen by contrast, so no number ever prints invisible.
- Empty cells stay empty — nothing is printed in them.
- Materials table — swatch, serial, hex code, cell count, share. That is your shopping list for beads or thread.
- Title — the file name you type when saving; leave it blank and it prints the default
VAS_pixel. - Layout picks itself — A4 as the baseline: wider than tall goes landscape with the info below the chart; taller than wide goes portrait, info below; a square goes landscape with the chart right and the info left.
“N painted” counts the cells you actually filled, not the area of the paper — that number is how much material you need.
Besides the chart, pixel art also saves as a plain image: PNG / WebP / TIFF give you the enlarged grid picture with empty cells transparent, JPG flattens onto white, and the scale uses the same size control as GIF. Saving a single-image document as GIF gives you a pixel image without grid lines — not an animation.
Machine-readable file interface: JSON
Pixel animation saves in a machine-readable format — JSON, not an image. Paste reads in an existing animation, Copy drops the whole animation onto the clipboard, Save writes it to a file. Export and import both stay easy.
◎Animation namerequired
The device finds animations by name, so the name must be unique; leaving it blank is blocked before saving.
But exporting doesn't mean it will appear. The name still has to be added to the group list in the device firmware for that animation to be rotated in — so remember to group it.
▤Category
Idle / Work / Dance / Expressions. These four values are format constants, shown in their original English across all four language interfaces — because that's exactly what the device consumes.
When an imported file carries a category outside this list, the editor keeps it as-is and carries it back out. As-is in, as-is out, ahead of any list tidiness.
The exported JSON feeds into the animation format of open-source devices — for example Clawdmeter and other desktop gadgets running on the ESP32. On the VAS side you copy the JSON source, on that side you paste it for an AI to process, with no conversion tool needed.
Pixel art uses the same outlets — but it is a different kind of document
Pixel art has the same three buttons — paste, copy, save — and it saves JSON too. But its file carries its own kind marker and version at the top, so the editor knows at a glance which kind of document it is holding; it doesn’t guess. A saved file reads back cell for cell, colour for colour: stop halfway, go do something else, come back and carry on.
The two kinds never eat each other by mistake: paste a pixel-art file into a device-animation canvas (or the other way round) and the editor says out loud that this is the other kind and asks you to open the matching canvas. It never swallows it silently into a mangled image — a wrong guess here fails quietly, which is why the kind is read from an explicit marker rather than from the shape of the file.
And “JSON is just text” holds for pixel art too — so the way of working with an AI in the next section applies to bead and stitch charts as well.
Drawing with an AI
This is where pixel mode differs most from the other chapters: its save file is a piece of text you can have a conversation with.
A frame is a two-dimensional array, each value a colour index, with 0 for transparent. This structure is readable by people and by an AI alike — so you can paste the whole animation to an AI, say "add three more frames to make it blink," and paste the returned JSON back into the editor.
{ "name": "vas", "category": "Idle",
"palette": ["transparent", "#F4ECE0", "#C471F5", "#4A9EFF"],
"frames": [ { "hold": 125, "grid": [ [0,0,1,1,0,0], … ] }, … ] }
An AI can't always draw your intent perfectly, but through an interface that speaks the same language as it, you can let it see what you mean.